Import accounts to your budget from Excel
Accounts can be added to your budget in three ways:
-
Add accounts from Sage Intacct when creating a budget with Sage Intacct data (See Create a budget using your Sage Intacct Planning data)
-
Create accounts one at a time (See Create accounts)
-
Import multiple accounts from an Excel (as explained in this topic)
Import multiple accounts from Excel
Importing accounts from Excel gives you the flexibility to add multiple accounts quickly and easily at any time all at once. After importing them, you can manage and map each one to your budget lines from the Accounts table in the Actuals > Mapping window.
If you're integrating with Sage Intacct and want to import your account data from Excel, you must first create a budget in Planning using the integration with Intacctto populate your budget with data. Once you import the data you have in Excel, you can easily map the accounts to your budget lines in Planning in the Accounts table. If you had to import each account individually from Excel, this process would be quite timely and burdensome. Importing multiple accounts simplifies the entire process.
Before you begin
Before you begin, make sure you have an Excel file with a list of the accounts you want to import. Download the template file (Excel, 10 KB) to assist you with setting up the file.
To import and map accounts to Planning from Excel:
-
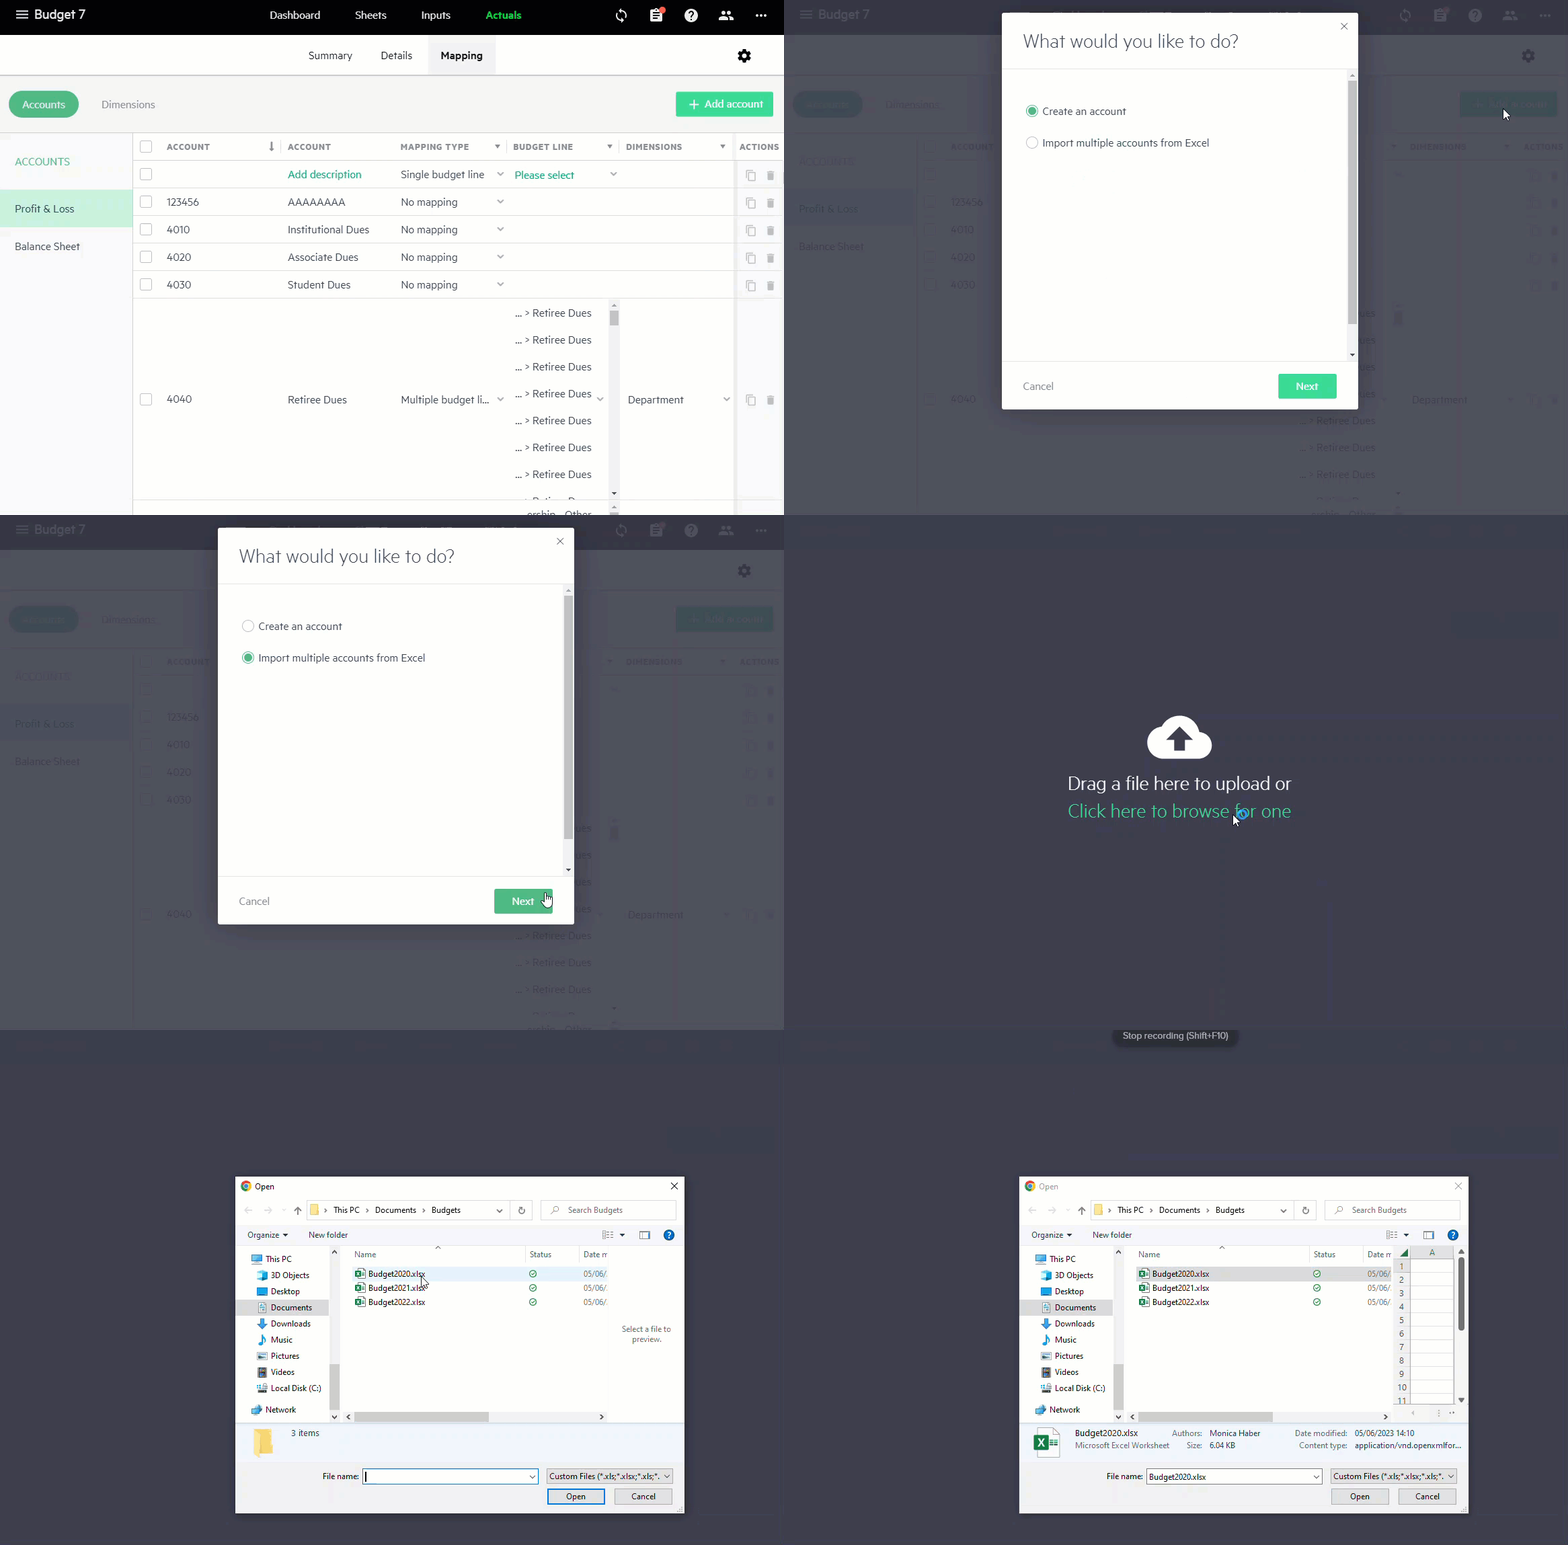
From the Accounts tab in the Actuals > Mapping window, click Add accounts.
-
Choose Add multiple accounts from Excel and click Next.
-
Locate the Excel file from which you want to import the accounts and drag the file to the upload window, or click on the link to browse for the file you want to import.
-
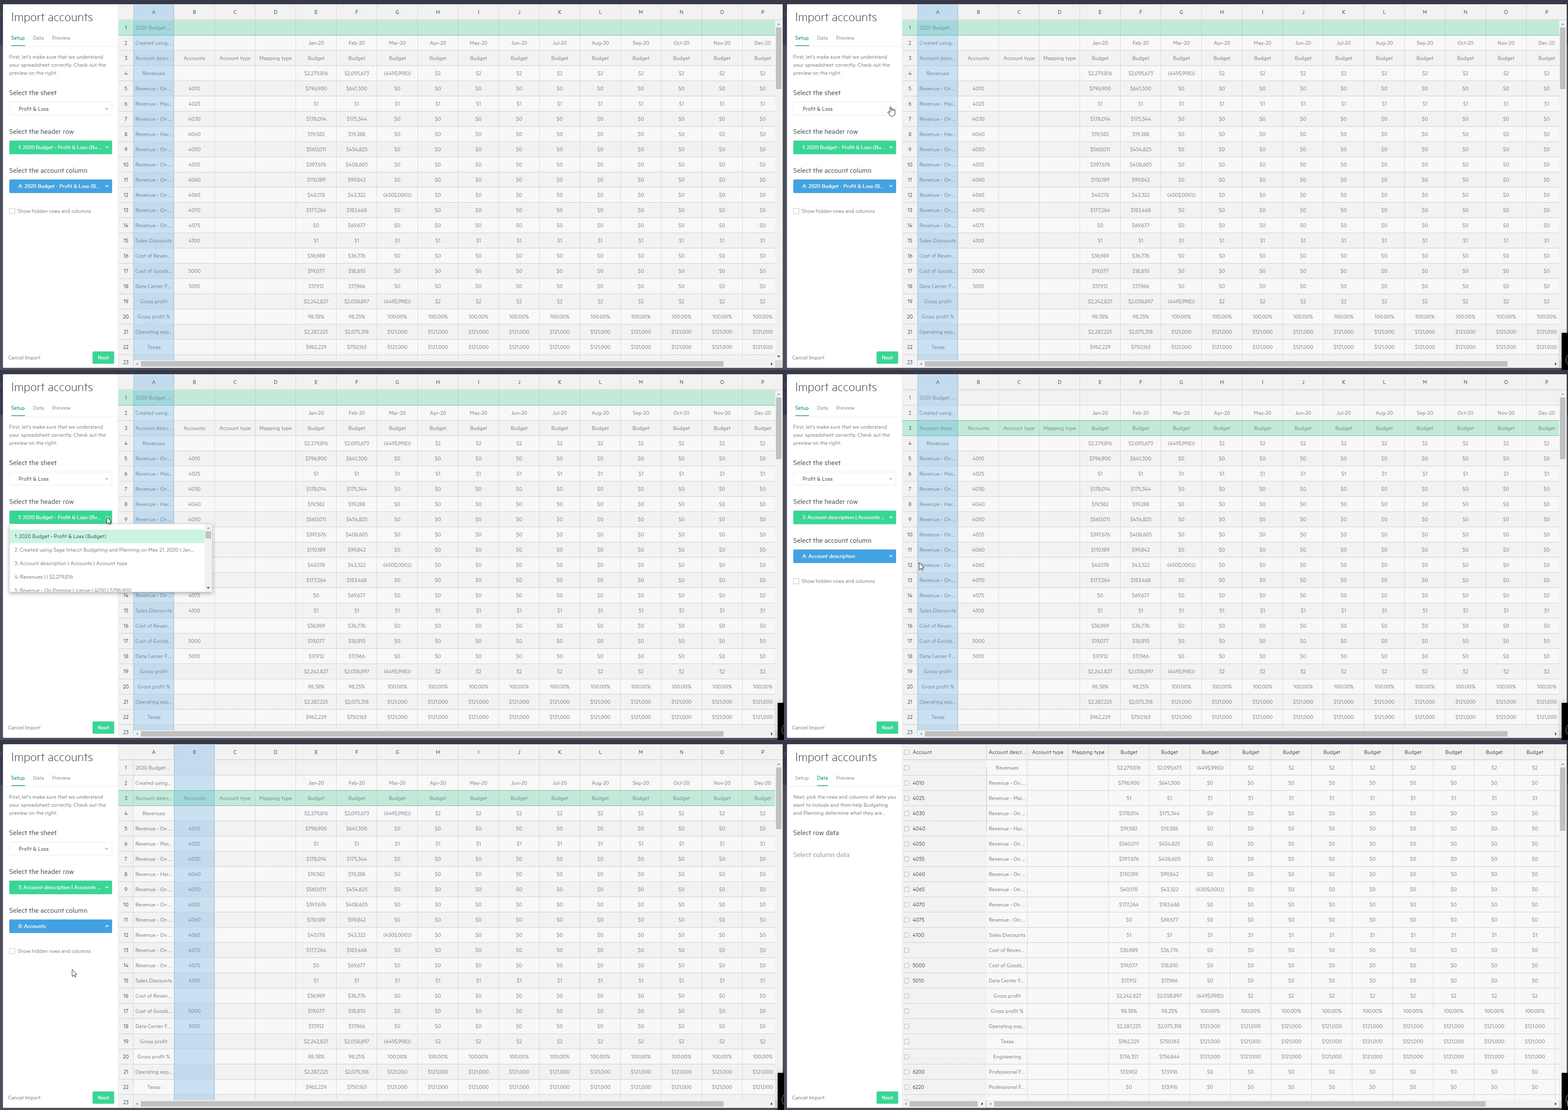
From the Import accounts window, select the relevant sheet from the Excel file, the header row which serves as the column names, and the column of the accounts you want to import and map to your budget. Click Next when you’re finished.
-
From the Data > Select row data view, select the rows you’d like to import. You can select all of the rows using the checkbox in the header row. Click Next.
Keep in mind that duplicate accounts can’t be added to your budget. If you have selected duplicate accounts, a Duplicate label appears in red and prompts you with a notification that you have selected accounts that already appear in the accounts mapping table. Change your selection to continue. If you choose to dismiss the notification, you will need to uncheck the rows of duplicated accounts from the mapping table.
-
From the Data > Column tab, select the columns from which you want to import data. Then, map the columns to the Account description (a description of the account received from the Excel file), the Account type (Profit & Loss or Balance sheet), and Mapping type (single or multiple budget lines) columns in Planning.
You can select to import only the account numbers, without mapping the other columns, and complete the data in the accounts table rather than from this wizard.
-
Click Next to preview the data before you import it into your budget. When you’re ready, click Import. The accounts are added to the end of the mapping table in the order they were imported.
From the mapping table, complete the remaining details of your accounts.
Is this helpful?
In this topic


