Import new model lines from Excel
You can get started with new model lines quickly by importing them from Excel.
Download the Model lines .csv file (12 KB) to help you prepare model lines data.
To import model lines from Excel:
-
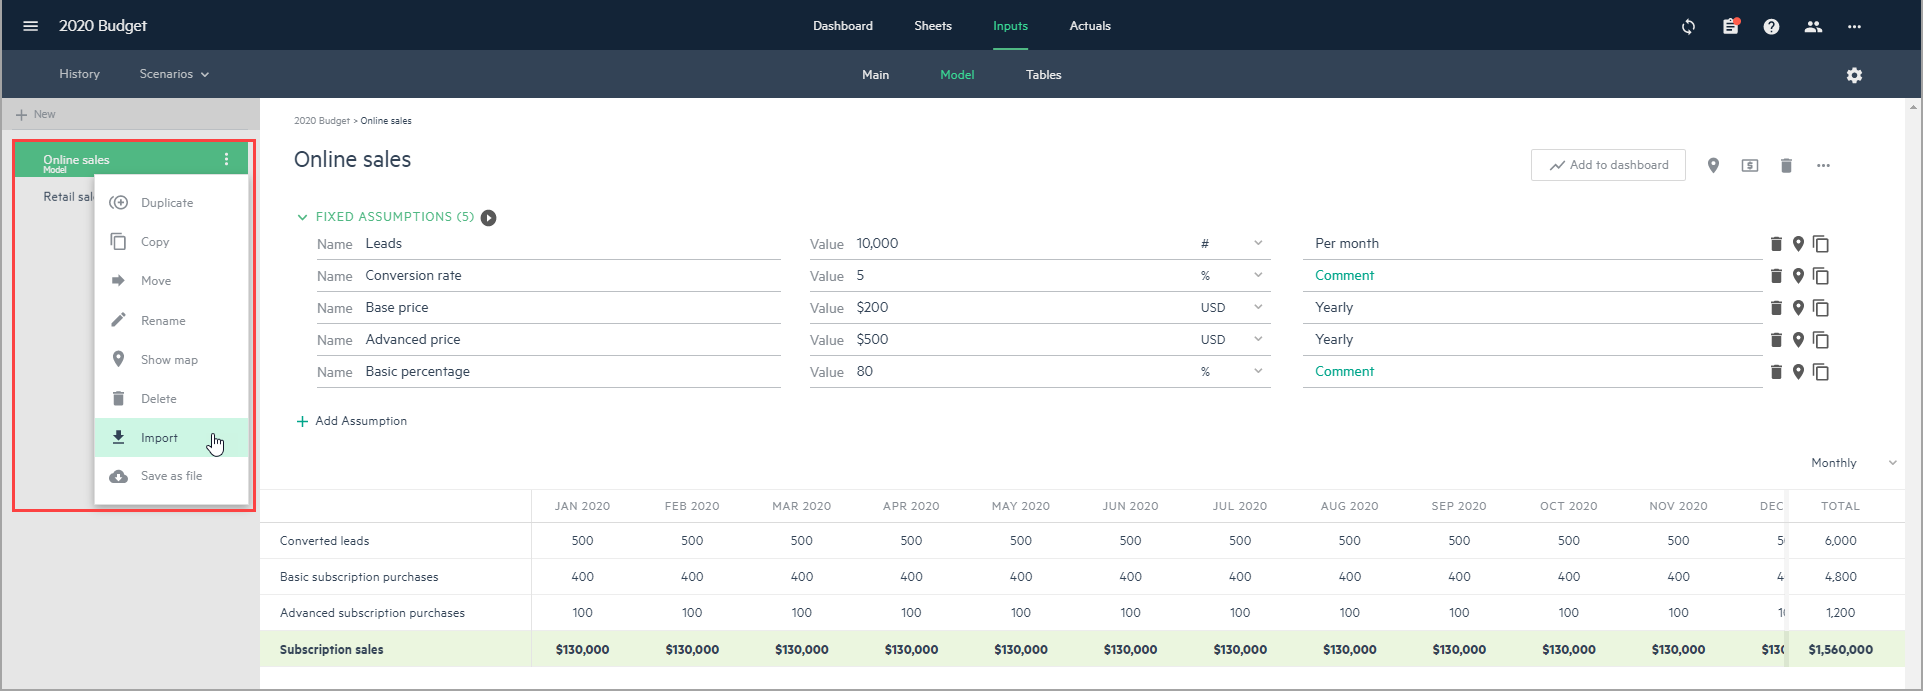
From Inputs > Model, click on the ellipsis menu of your model and select Import.
-
Locate the Excel file that contains the new model lines and drag it to the upload window, or browse for the file you want to import.
-
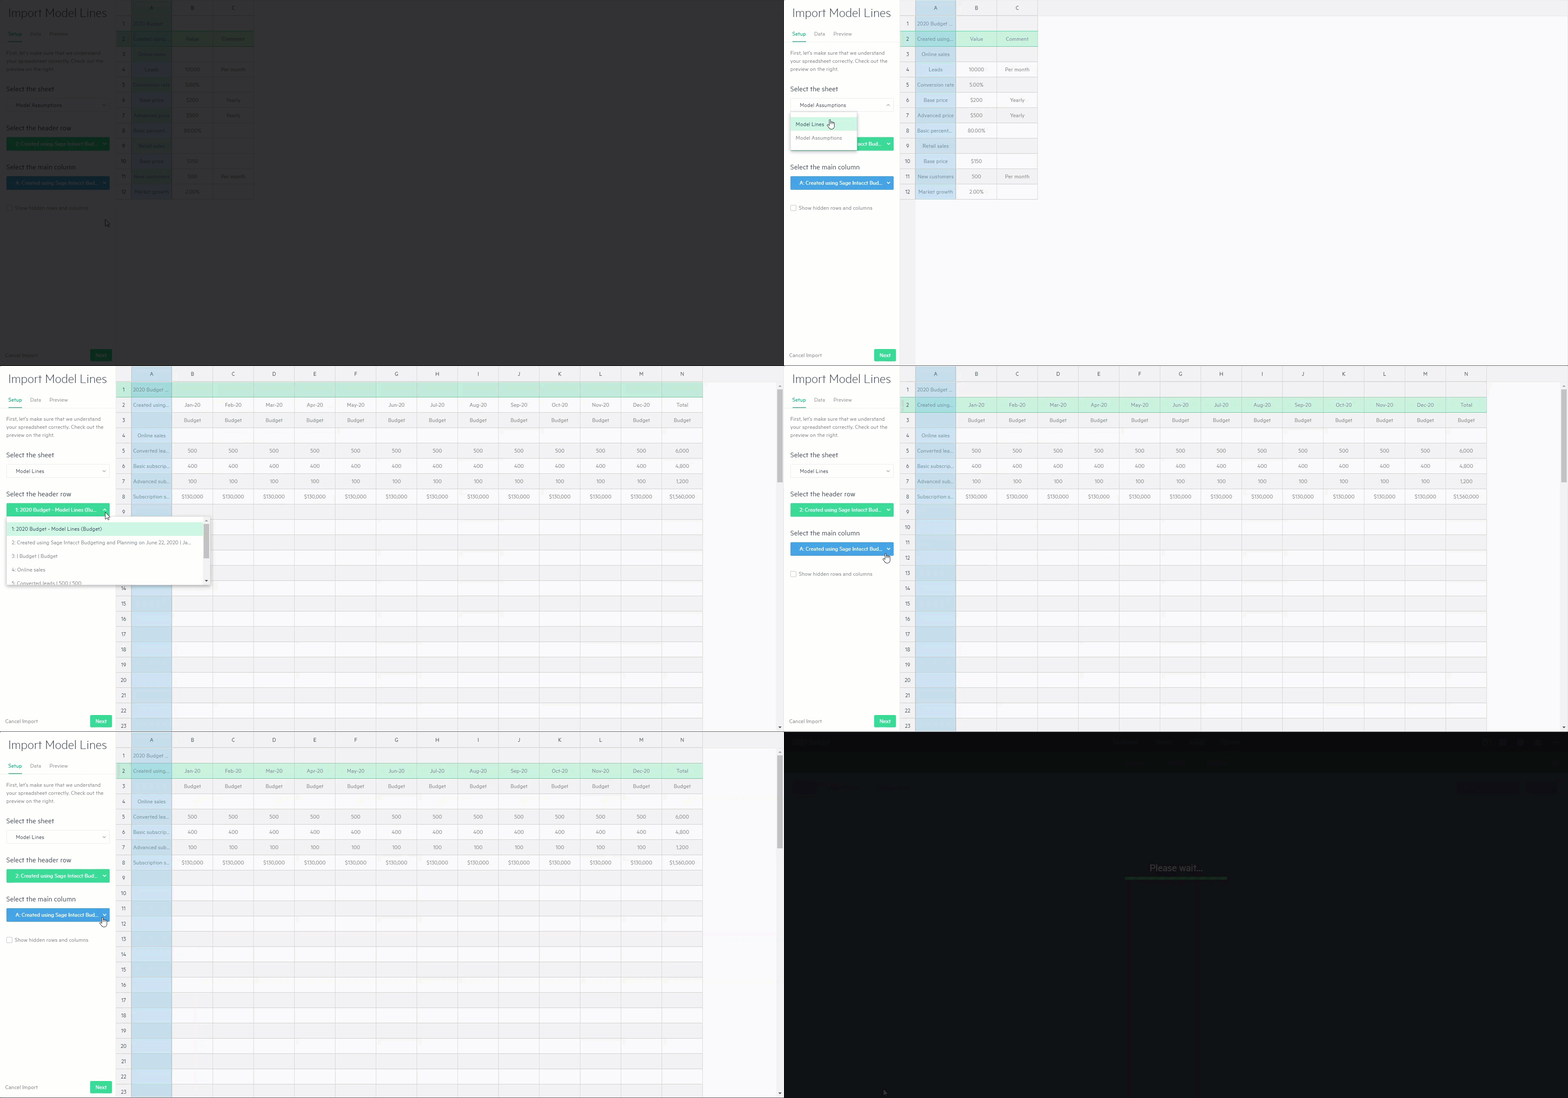
Select the relevant sheet from the file, the header row which serves as the column names, and the main column which serves as the model line names. Planning does the selection automatically but you can change the selected data manually if needed. Click Next.
-
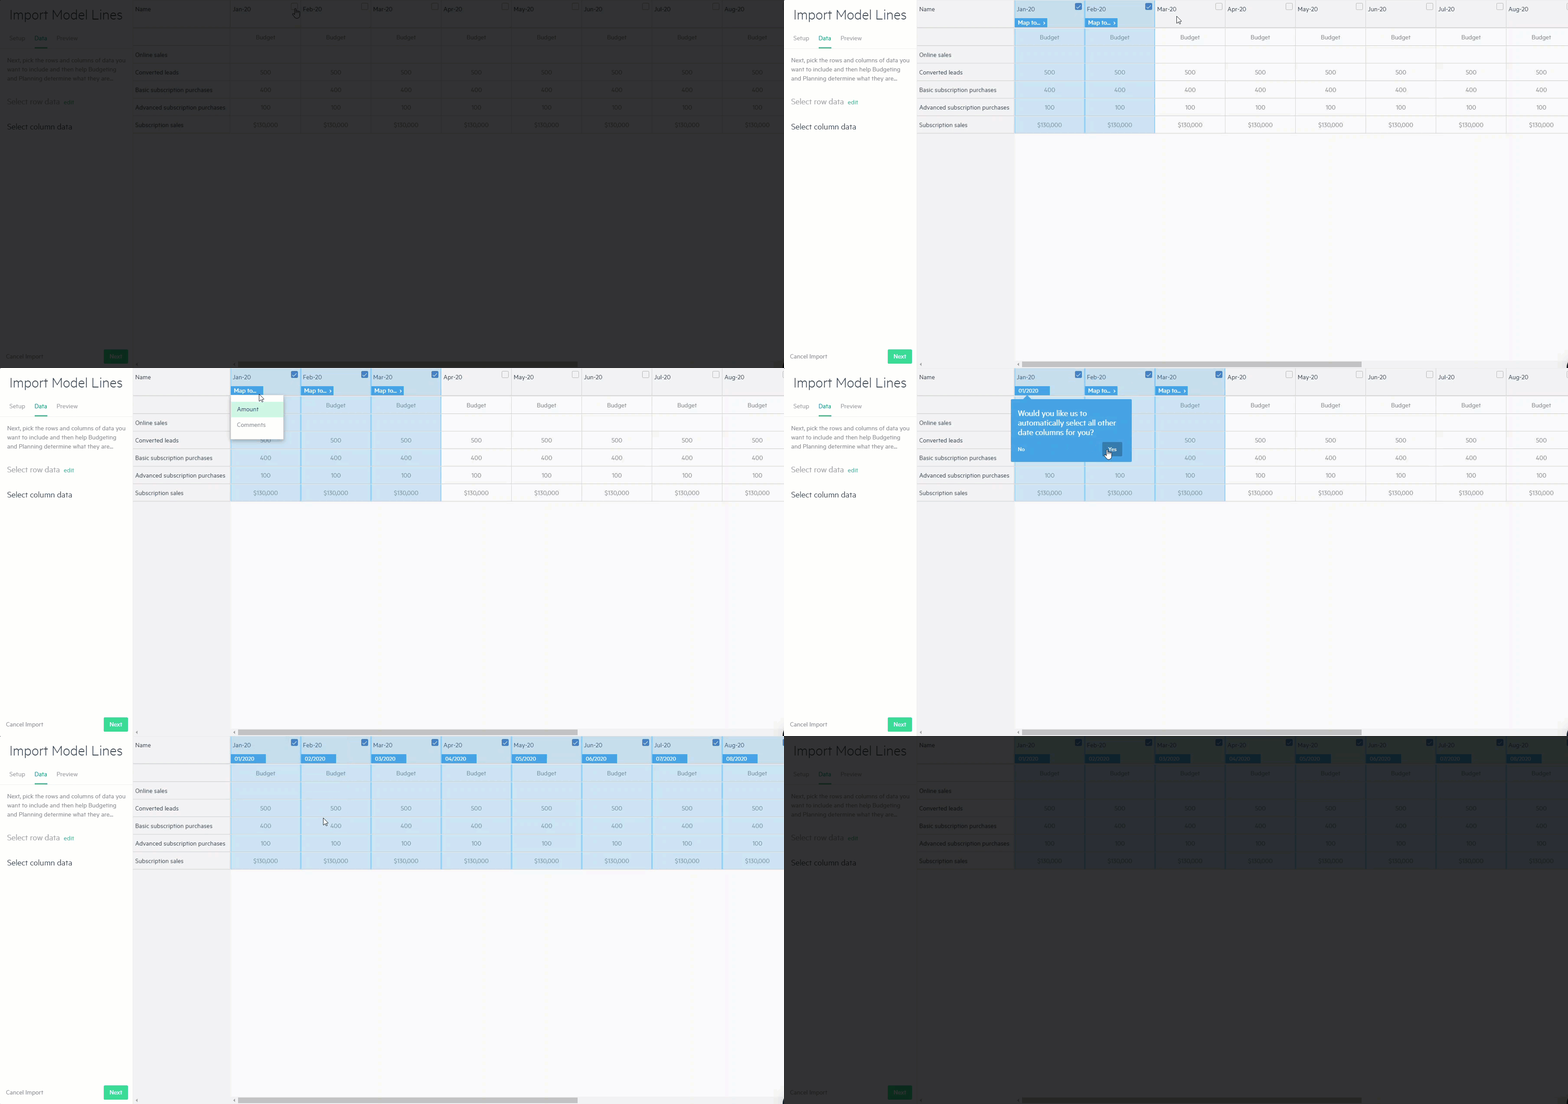
From the Data tab, select the specific data rows to import or select all. The selected rows appear as model lines in Planning. Click Next.
-
Select the data columns to import.
-
From the dropdown, select where to map the new data to in Planning. You can map the new data to an Amount field and select a date if needed, or to a Comments field. Click Next.
-
Preview the new data before you import it into your budget and click Import.
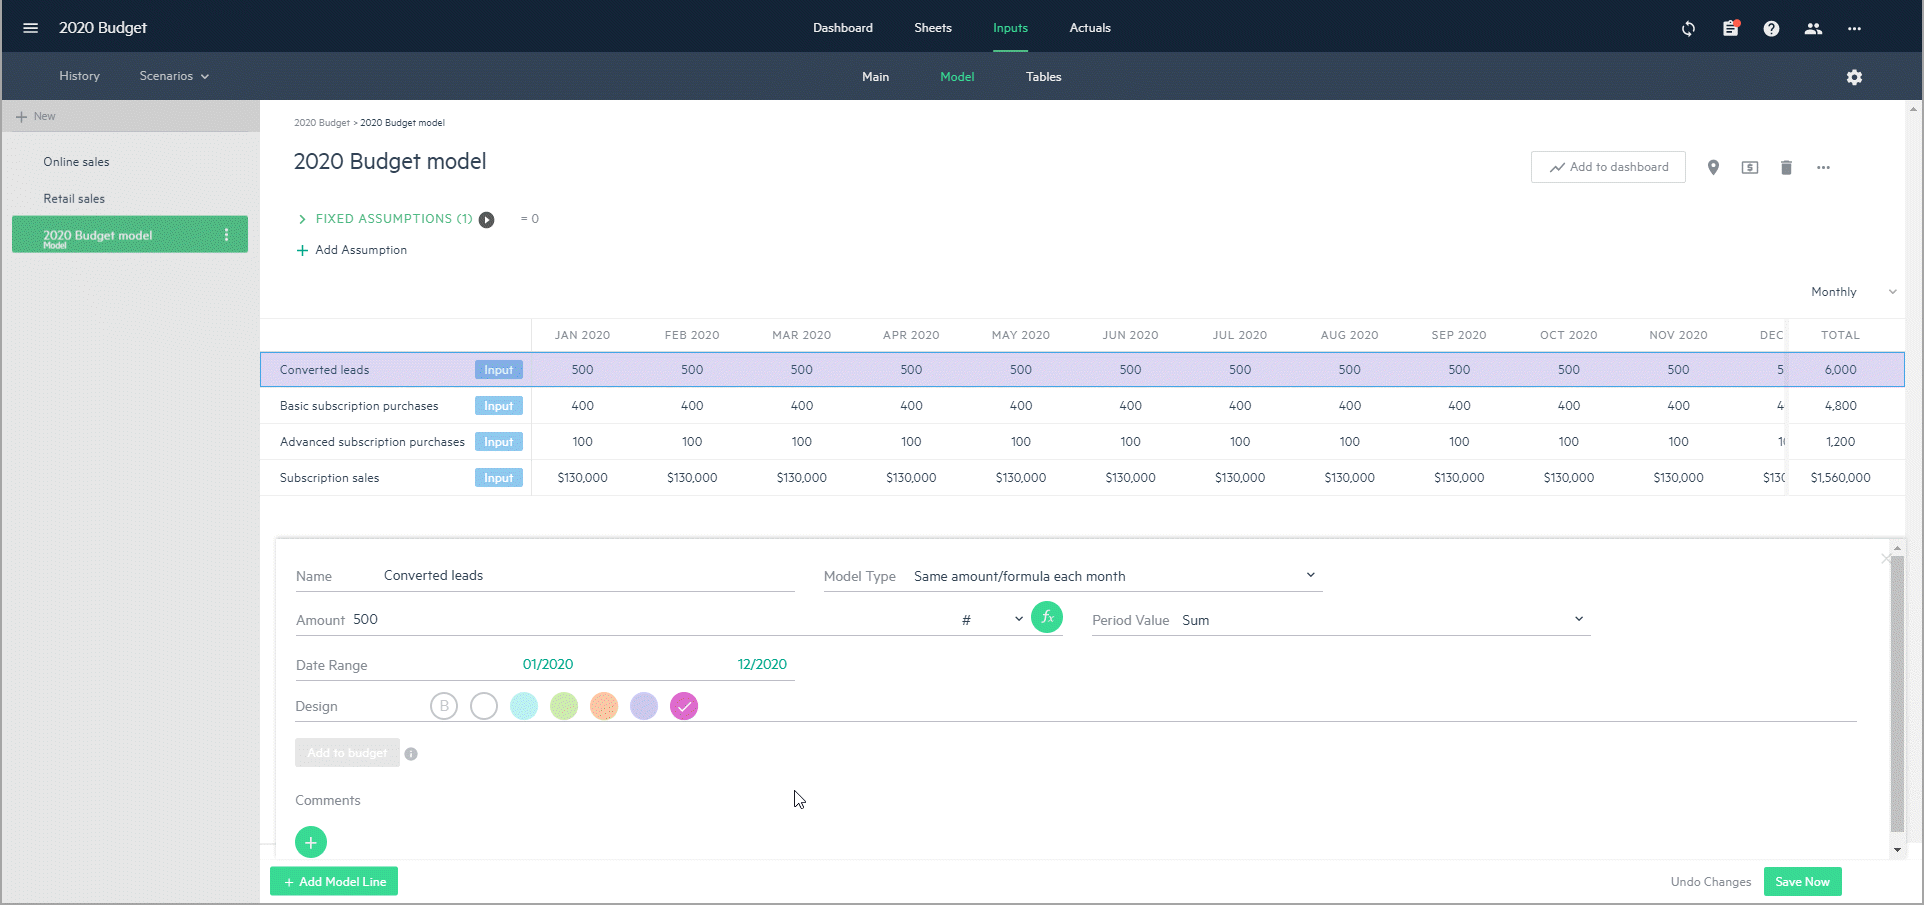
The new model lines are added to your model as Same amount/formula every month or as Various amounts and can be edited.
An Input label appears on the imported model lines so that you can differentiate them from model lines that you entered manually.
You can reuse the same file to import additional model lines to the same or a different model in the same budget.
Previous model line selections are saved and highlighted in yellow.
Is this helpful?
In this topic


