Create your plan with the Planning Wizard
Use the Planning Wizard to guide you through the following tasks to upload your financial data from an Excel file to a new budget in Planning.
Set up your data
To set up your budget properties and prepare the data you want to appear in your budget, follow these steps:
Set up and upload your file
To create a budget, first, export the budget data from your ERP system. Prepare your data making sure that you have the necessary fields to build your budget, including the reporting period, accounts, account groups, and dimensions.
To set up and upload your file:
- From the budgets menu, click + New budget and select Upload an Excel file.
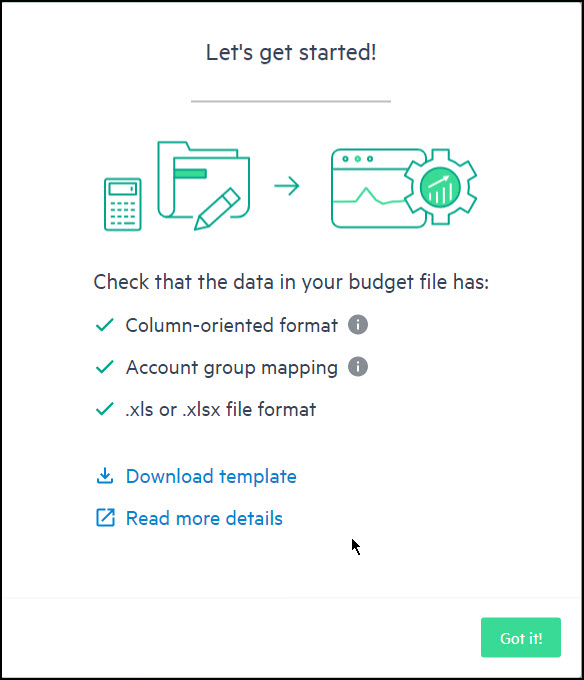
- Click Next and confirm that the data in your file meets the stated requirements.
- Column-oriented format - Related data for each account must be stored by columns rather than by rows. Each account appears in a separate row.
- Account group mapping - Accounts must contain an account group that can be used to map your correlating unique values to the standard groups in Planning.
- .xlsx file format - The uploaded Excel file must be .xlsx format.
- To assist you with preparing the data you intend to use to create your budget, click Download template and then click Got it!.
- Browse and select the file that contains your data to upload and click Let’s start.
Set your budget properties
In the Set up your budget properties window, enter the following basic information for your new budget:
-
Budget name - Defines the name of your budget
-
Budget main currency - Defines the base currency when you first build your budget
-
Budget type - Defines whether your budget is for a company or a nonprofit organization.
-
Date range -Defines your budget period
-
Fiscal year start - Defines the starting month of your fiscal year
Define your budget dimensions
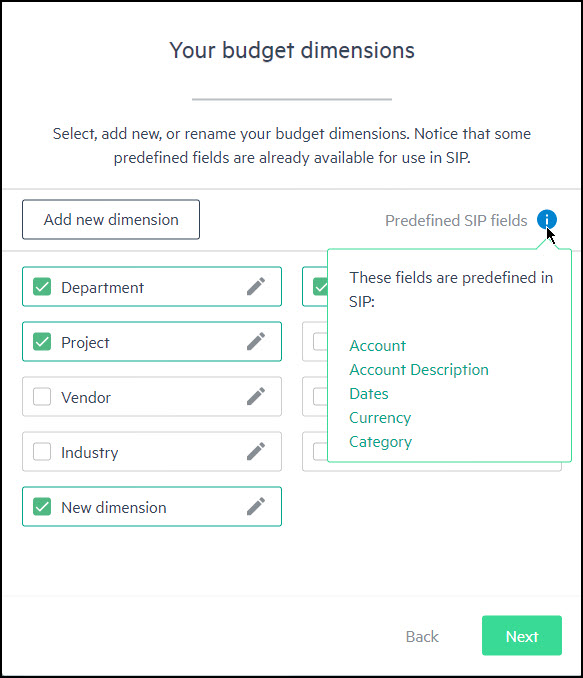
Dimensions are fields or values that you can associate with the existing data in your uploaded file to help classify, slice and dice, or create roll-ups. You can add new or select predefined dimensions in Planning and later use them to map the data from your file to your budget. For more information, see Dimensions and Understand your data and how it’s stored.
Some predefined fields, such as Account number, Account description, Tags, Comments, Dates, Currency, Account group, and Opening balance already appear in Planning, so there’s no need to add them as dimensions.
To add dimensions to your budget:
-
After you click Yes as to whether you want to add dimensions to your budget, select the dimensions you want to associate with your existing data and add them to your budget.
-
(Optional) Add new or rename existing dimensions.
-
Click Next.
Map your data
Your data is now displayed in a table format to allow for easy previewing and mapping. The Planning Wizard has built in intelligence that validates the uploaded data to the standard fields found in Planning.
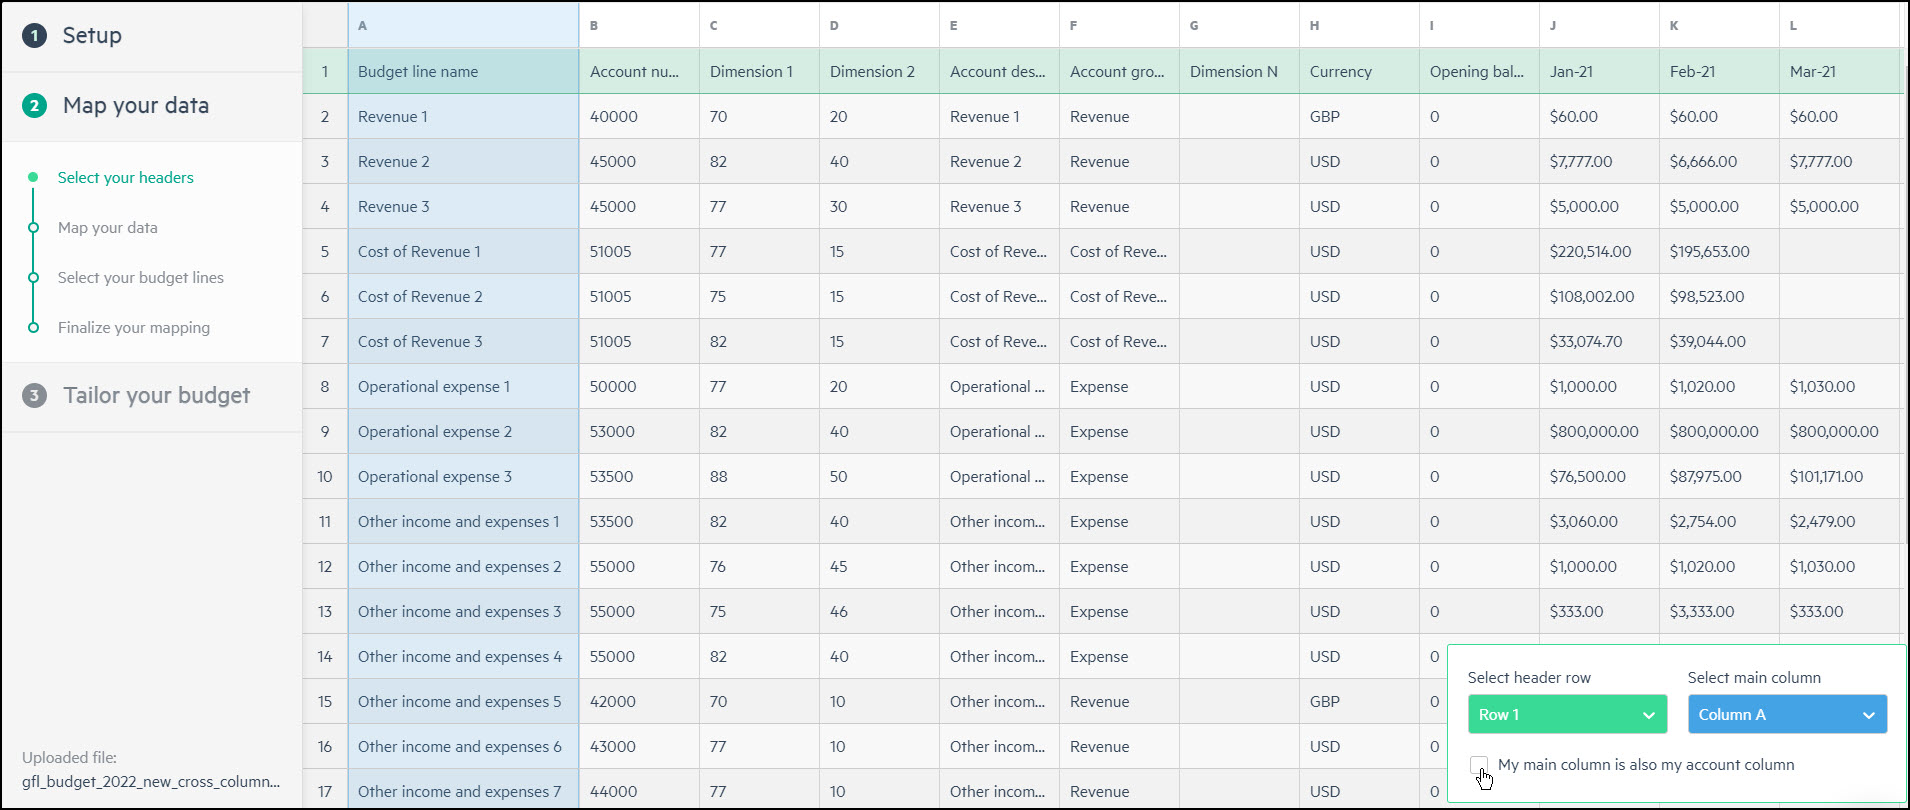
Select your header row and main column
To set up the data you want to import:
-
Select the column that identifies what you want your budget line names to be in your budget tree.
-
Select your header row to indicate your data field headers.
-
Click on a different row or column to adjust your selection and click Next.
-
If you want your main column to also be your account information, select My main column is also my account column. The name of the column header changes to Name & Account. So, for instance, if you select the Account number column to also be your main column, the account number is used as your budget line name in Planning.
Map your data to Planning
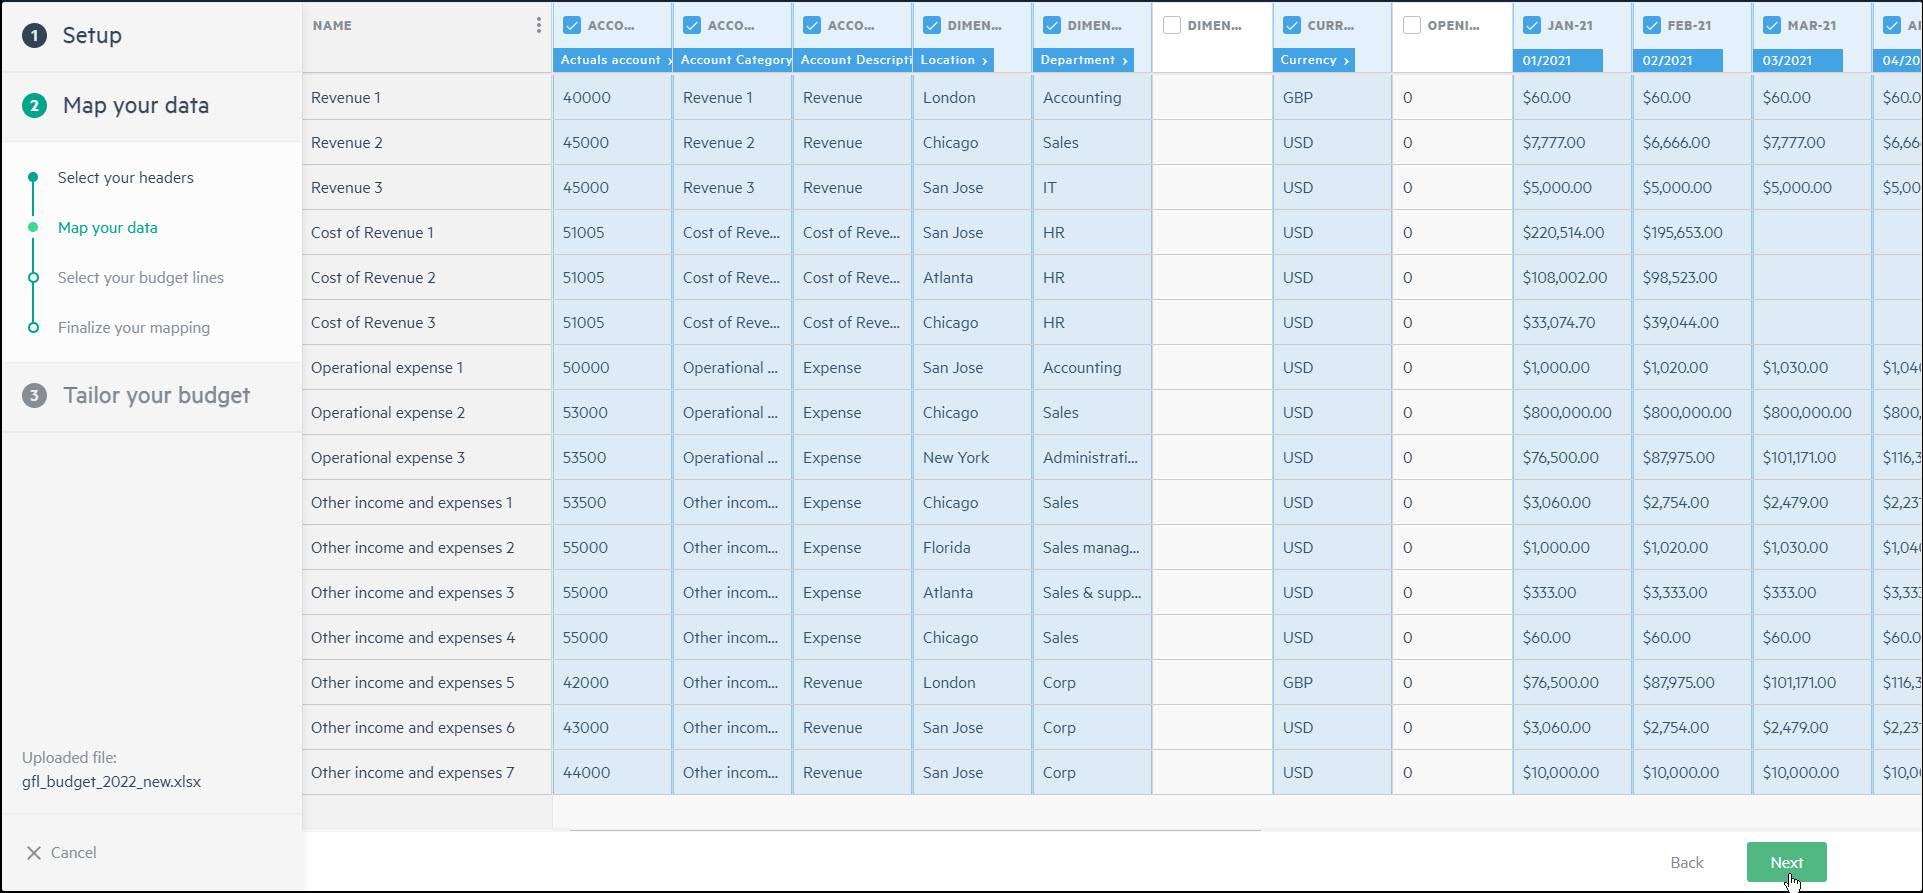
Mapping your data improves how your data is read and calculated before budget lines are created in Planning. Using a legend-like mechanism, the Planning Wizard provides better accuracy when matching the data fields from your file to the standard naming conventions used in Planning.
To map your data:
-
Select the data columns you want to incorporate into your budget.
-
Map your data columns to one of the options in Planning from the dropdown. This helps validate your data to the associated field headers from the header row you selected in the previous step
If there’s an exact match between the selected dimensions in this step and the names of your uploaded file column headers, the selected columns are automatically mapped with the dimension name.
-
You need to map your account number, account groups, and amounts to continue. These fields are used by Planning to structure your budget by your predefined selections.
Select your budget lines
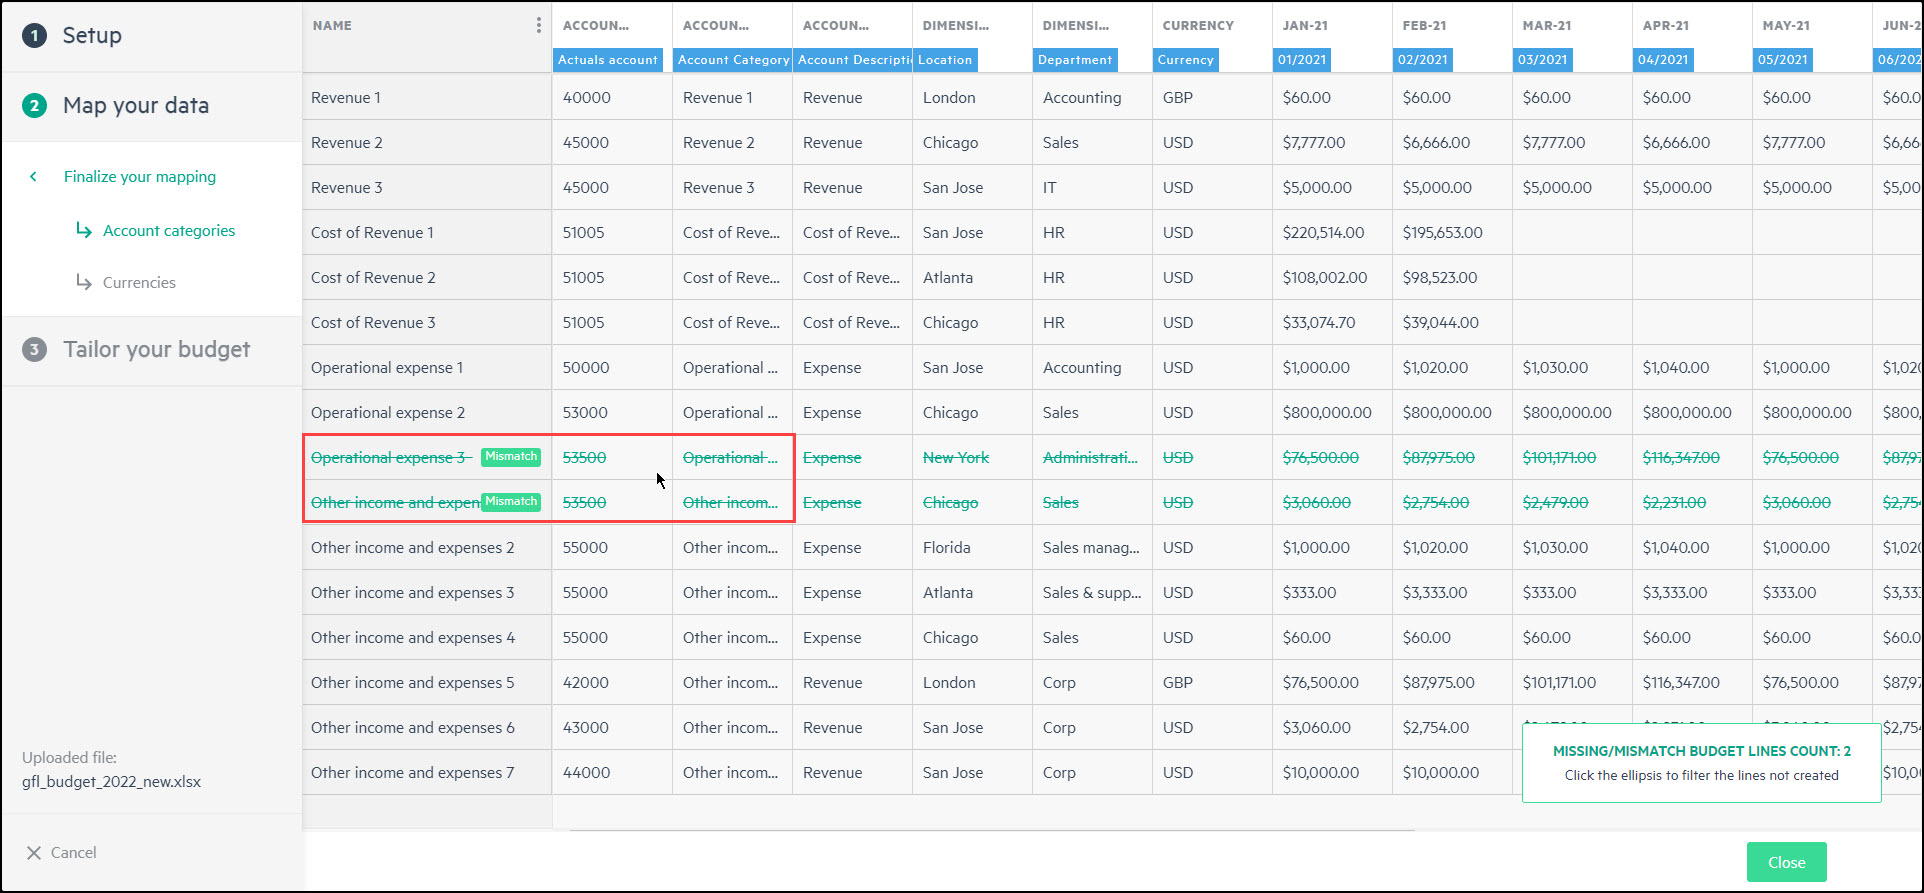
Select the data lines you want to incorporate into your budget. Click Enable filters from the ellipsis menu to filter your data for easier selection.
Map your account groups
To accurately identify and translate your data, match the naming conventions and values in your data to the values used in Planning.
Your data needs to contain and be mapped to account groups that correspond to the budget groupings in Planning for budget lines to be created in Planning. In addition, each account can only be mapped to one group. From the multi-select dropdown, map the unique values representing your account categories to the standard account categories in Planning.
If you have missing or contradicting mappings to account groups, a Missing or Mismatched tag appears on the lines you want to import that use this account. For example, if you haven’t mapped an account group to a corresponding budget group in Planning, you’ll be prompted that there are missing values. Additionally, if you have 2 lines for the same account that are mapped to 2 different account groups, you’ll be prompted that there’s a mismatch.
To import these lines, you can go back to Account group mapping or click Preview to see your account mappings. Otherwise, these lines aren’t imported and the budget lines aren’t created in Planning.
Manage your budget currencies
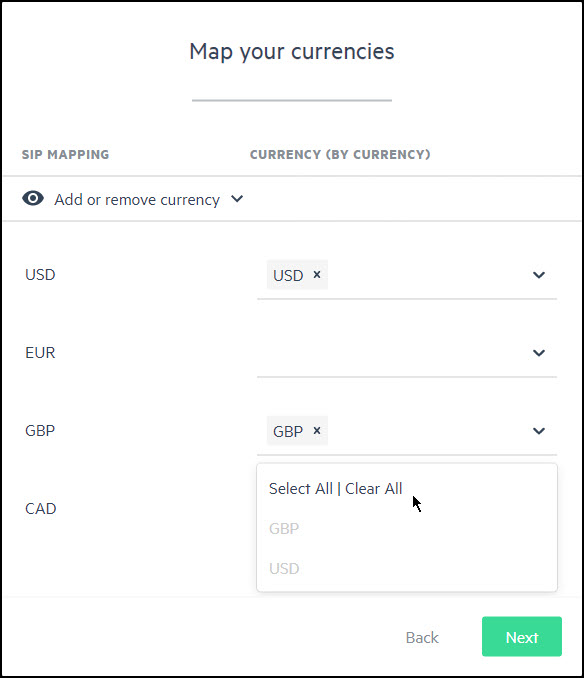
When you work with multi-currency companies, you may want to set up your budget or add transactions with multiple currencies. From the budget wizard, you can assign the currency values from your file in the multi-select dropdown to the standard currency values used in Planning.
You can also add additional currencies to the standard currencies used in Planning and map your currency values accordingly.
If you decide not to map your currency values, the currencies are automatically assigned in Planning according to the data in your file:
-
If you have a currency sign in your data amounts, the budget line is assigned the corresponding currency of the sign that appears in the first amount period of the line.
-
If you have both currency signs and mapping for the currency column, the budget line is assigned the currency of the column mapping.
-
If you don’t have currency signs but have mapped the currency column, the currency value is assigned the currency of the budget line of the mapped value.
-
If your data has no currency signs and no mapping for the currency column, the currency you selected when you defined your budget properties is the default assigned currency.
Tailor your budget
By default, your data is displayed in Planning in budget groups based on the standard components of an income statement. If you selected to add dimensions to your budget, you can tailor your budget hierarchy by dimensions to accommodate or coincide with your unique business operational segments.
Understand your data and how it’s stored
The Planning Wizard helps you organize actuals or budget data according to your budget structure by dimensions, such as by Location or Department. Based on how you post data or transactions, your data is populated to budget lines that have an exact match to the budget structure and dimension hierarchy you defined during budget creation.
If you have data that only partially matches the dimension hierarchy you defined during budget creation, it can also be uploaded, as long as the data contains a dimension matching the parent level of your budget structure hierarchy.
For instance, if you create your budget structure by Location, Department, and Category, but your data doesn’t have a value for the sub-dimension (for example, Category), the data is still uploaded, but to the next matching parent dimension level (that is, Location > Department). The data is then imported to a budget line representation that matches the lowest level (or lowest common denominator) of your budget structure hierarchy.
Data that doesn’t match any part of your budget and dimension hierarchy isn’t uploaded.
After you choose how you want to populate your budget with data, you can rethink the way you defined your budget structure and modify it to accompany your data.
Set up your dimension hierarchies
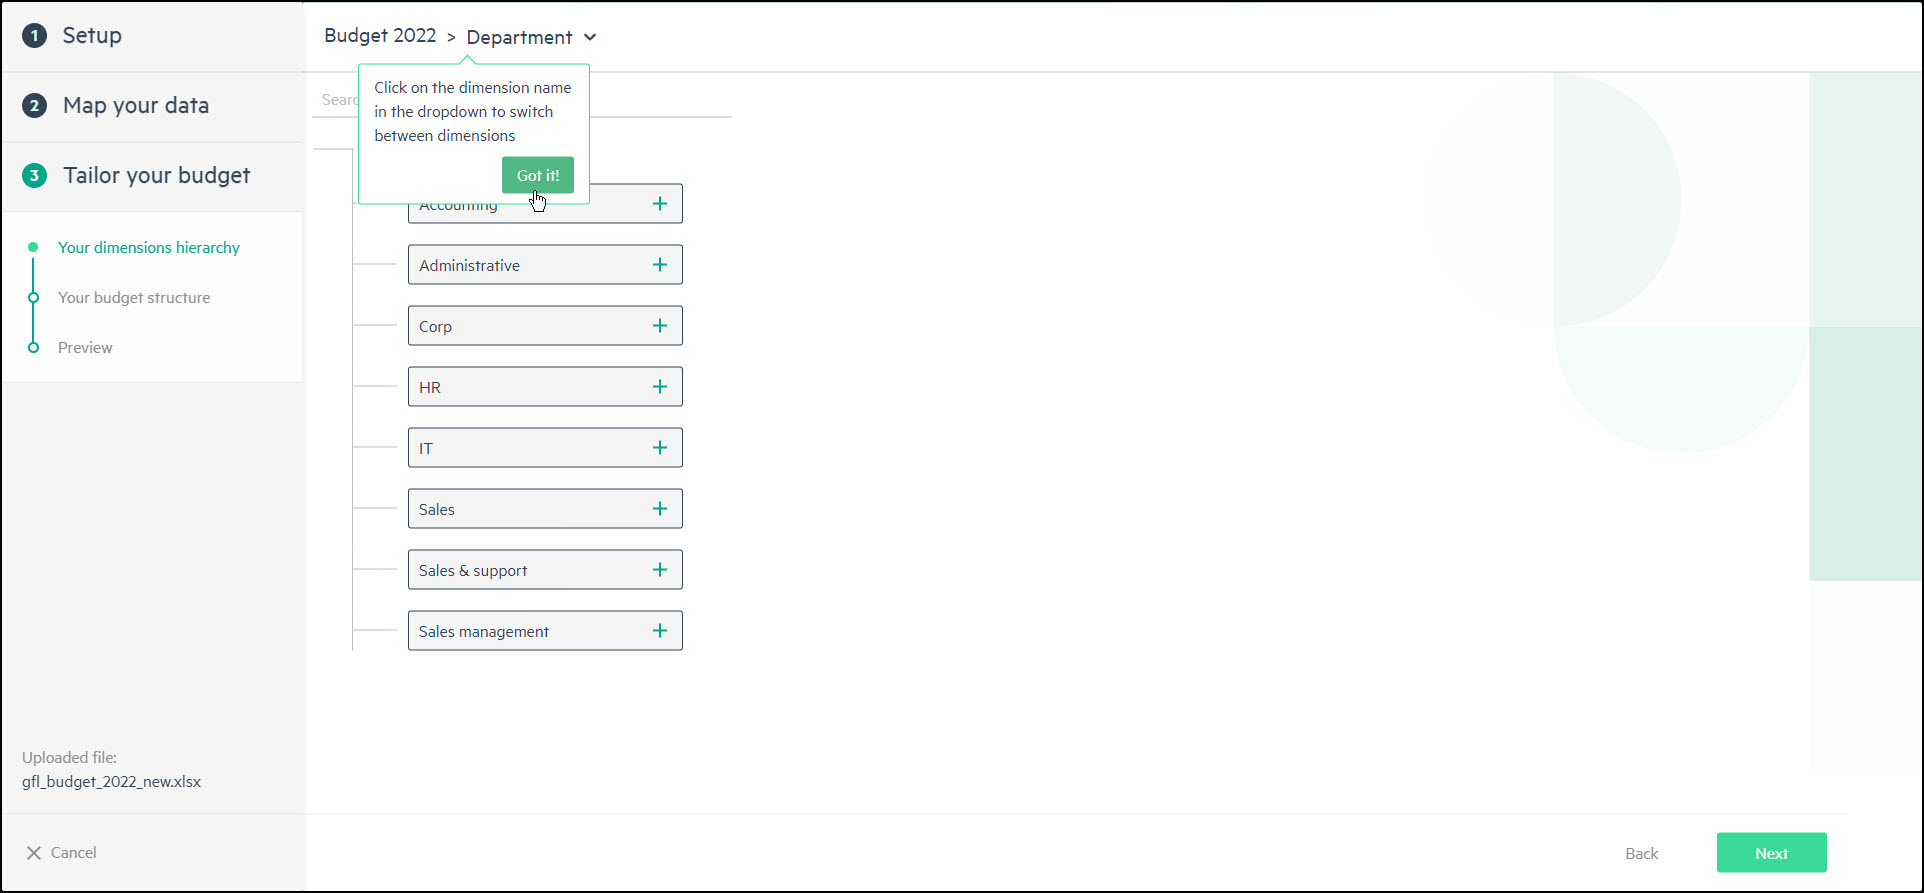
Hierarchies reflect how you organize dimensions and the dimension values in your budget. When you create hierarchies, you can add multiple levels of dimension values to your structure. If you decide to create dimension hierarchies, you can easily do so.
To set up your dimension hierarchies:
-
Click on the dropdown of the dimension name to toggle between dimensions.
-
Click the plus icon
 that appears next to the dimension value to add one or multiple dimension values.
Modify your budget structure
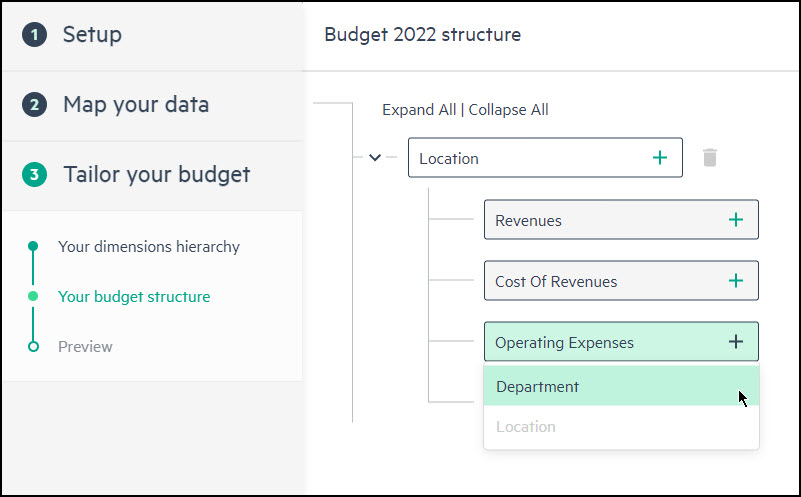
From the standard budget structure used in Planning, you can add up to four dimensions in a hierarchical fashion per budget group (Revenues, Cost of Revenue, Operating Expenses, or Other), or up to four dimensions at the top level. Alternatively, you can add a combination of dimensions per budget group, as well as at the top level.
For example, if you have a multi-entity company and want to see your data by subsidiary or location, you can add the Location dimension to the top level of your budget structure and see your budget data for the subsidiaries to which you have access.
Final preview of your budget
Before your budget is created in Planning, you can review and make any necessary changes. Simply go back, modify what you want, save your changes, and then click Import away!
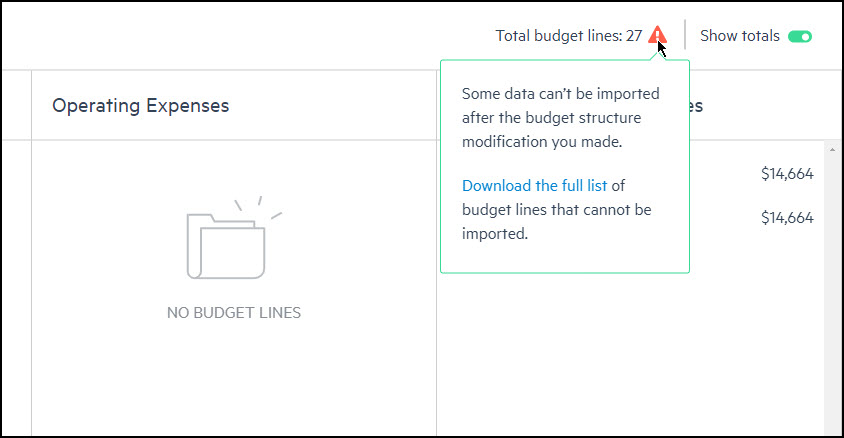
If data you chose to populate your budget doesn’t match your budget and dimensional hierarchy, a warning appears next to the total number of budget lines. Click Download the full list to see the list of data that won’t be uploaded to your budget.
Is this helpful?
In this topic
